I recently read an article written by Ben Herbst here on DevsforDevs about setting up Sunshine as a Self-Hosted remote gaming service. It's a great article on getting the initial setup completed and adding your first PC client using Moonlight. I won't be reinventing the wheel, so for the initial setup please read it here. Sunshine is a great service for remote gaming, but it is also a fantastic low latency solution for VNC or RDP access to your machine.
What I will be writing about will expand on Ben's article and I will review:
Tips for setting up applications quickly and easily in Sunshine
Tips on downloading box art and setting art in Sunshine so it appears in the Moonlight client
Basic set up of Playnite as a unified launcher, including a mobile interface that looks and works amazing on portable devices.
How to change resolution using Sunshine to support mobile devices or hardware with non-standard resolutions
Recommended settings for Moonlight depending on resolution and use case (portable or home)
In a Part 2 article I will take this a step further and teach you how to completely virtualize your gaming rig. There are many benefits to a virtualized rig which I will discuss in the next article. After finishing both articles you should be able to go from a bare metal Windows gaming rig, to a fully virtualized "cloud"-type setup.
Post Sunshine Install: Setup and Tips
After you've completed the initial Sunshine setup you will want to add applications, setup box art, and/or setup Playnite as a unified game launcher. Playnite has the added benefit of a really nice interface for mobile devices, with a controller based GUI.
Login to your Sunshine instance at localhost:47990, and at the top choose "Applications". When this section has loaded you will see a button to "Add New", click this button. It will load a form to fill out below your application list:
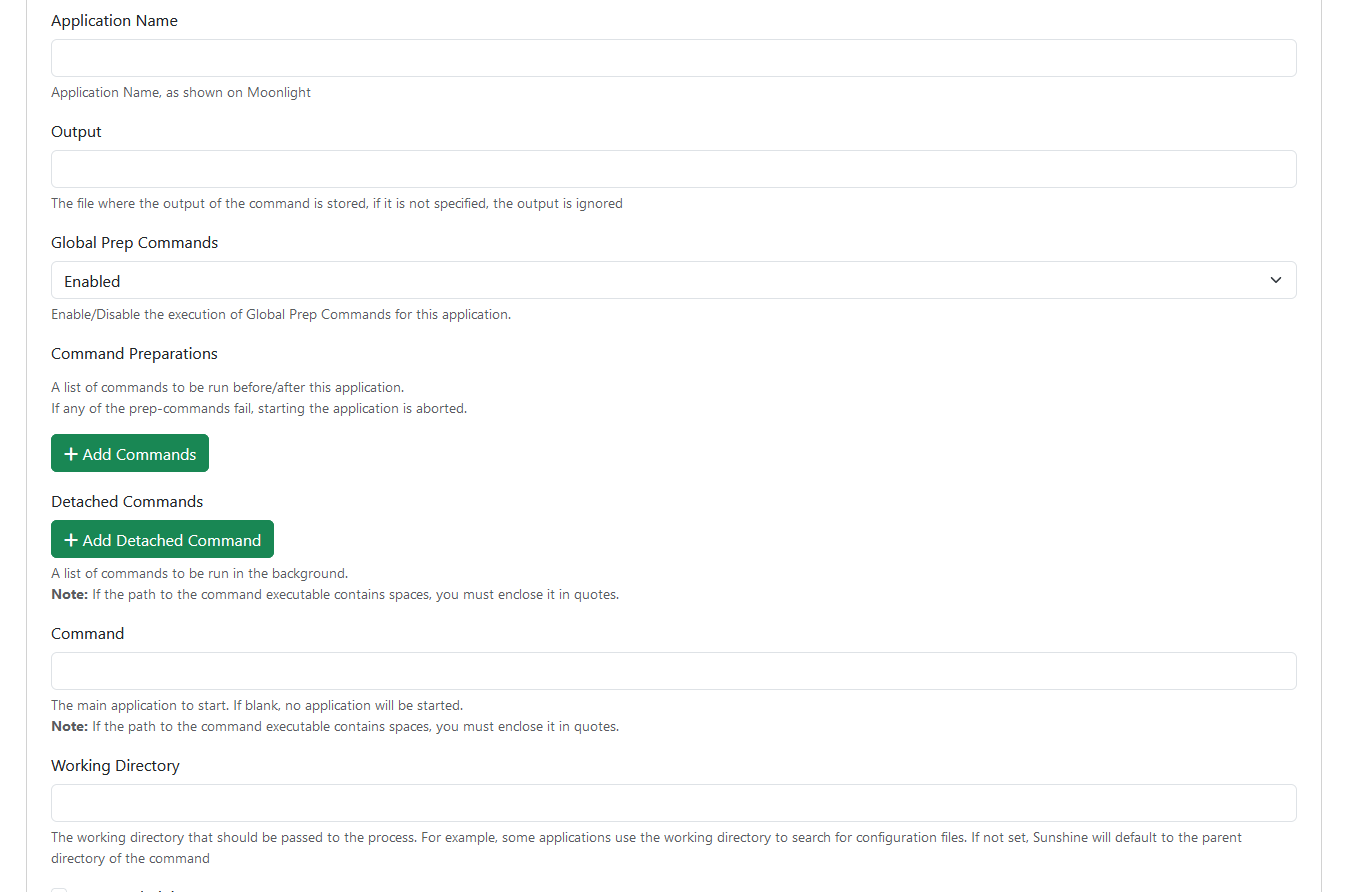
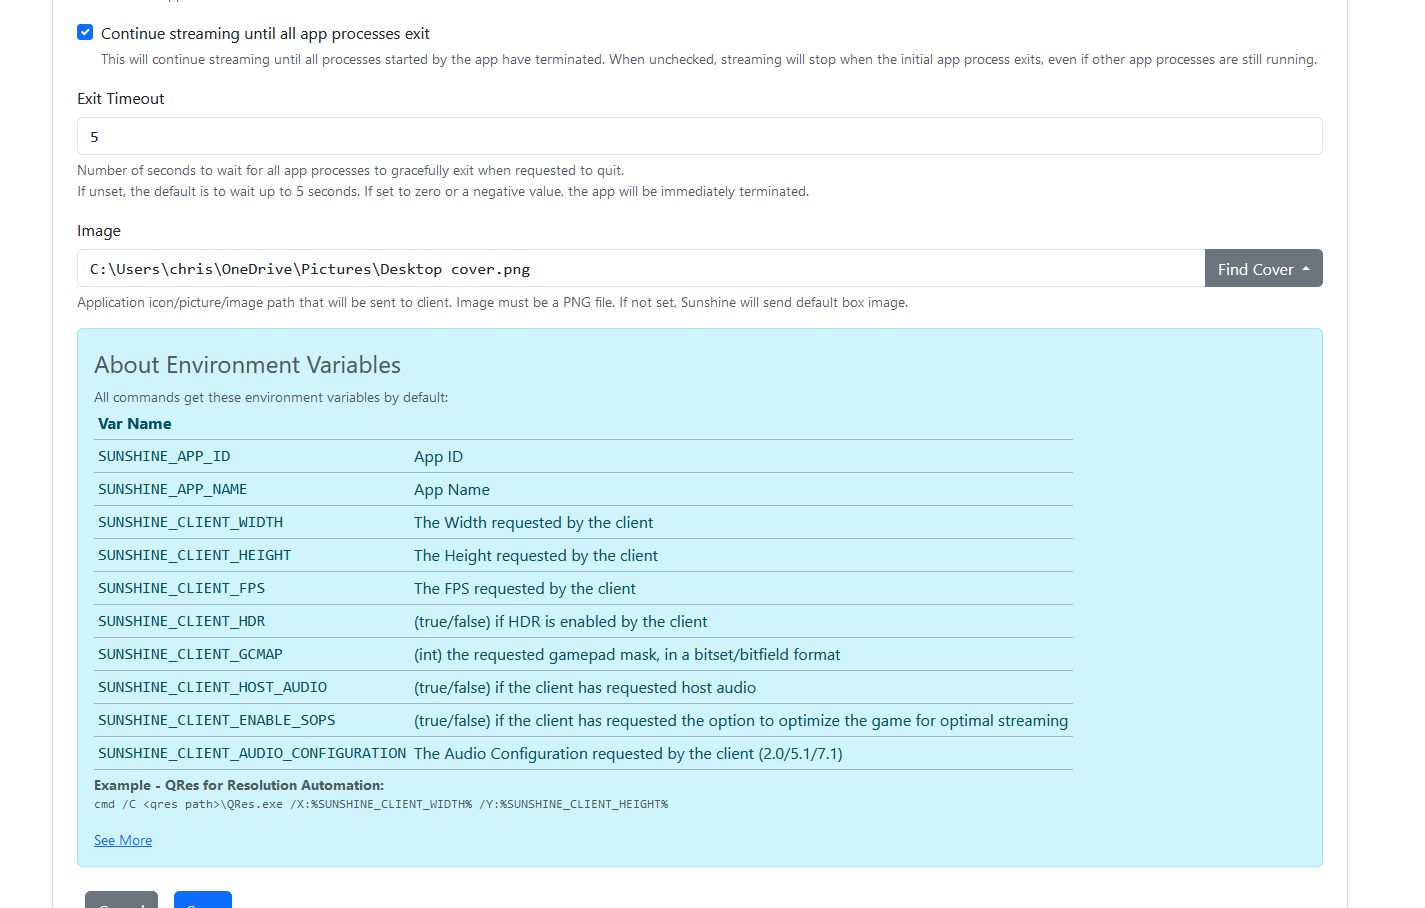
Name the application, leave "Output blank", and leave "Global Prep Commands' enabled. For now we will skip the "Command Preparations" section, we will come back to this later. In the box labeled "Command" you will put the path to the game or application you want to launch. To simply launch your desktop leave the box empty. "Working Directory" is not required for most software. Scroll down a little further and you will see an empty box labeled "Image". This is where you will put box art that will appear in the Moonlight client.
To add box art put the path to the image file. I use https://www.steamgriddb.com/ to download box art for games and software. SteamGrid DB box art has the proper size and resolution image for the majority of games and software I've needed.
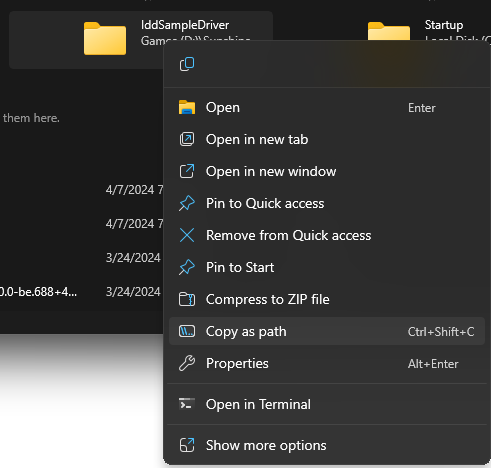
To quickly copy the location of software or images you can navigate to the item in Windows 11, right click on the exe or image, and choose "copy as a path". Paste this link to the Command or Image box and remove the quotations that surround the directory path.
Basic Playnite Setup
This section of the article will cover the basic steps to get Playnite up and running, and how to add it to Sunshine. This will not cover an in depth setup of Playnite such as add-ons, game libraries, or backups. You can refer to the Playnite documentation for additional configuration.
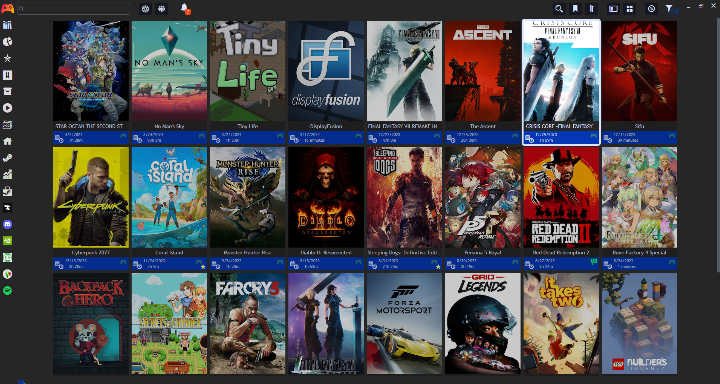
Open a browser and navigate to https://playnite.link/, download the Playnite software and install it to your gaming rig. To make Playnite work as a unified launcher you will need to add your game libraries. To do this click the controller in the top left, and choose "Add-ons" from the drop down menu.
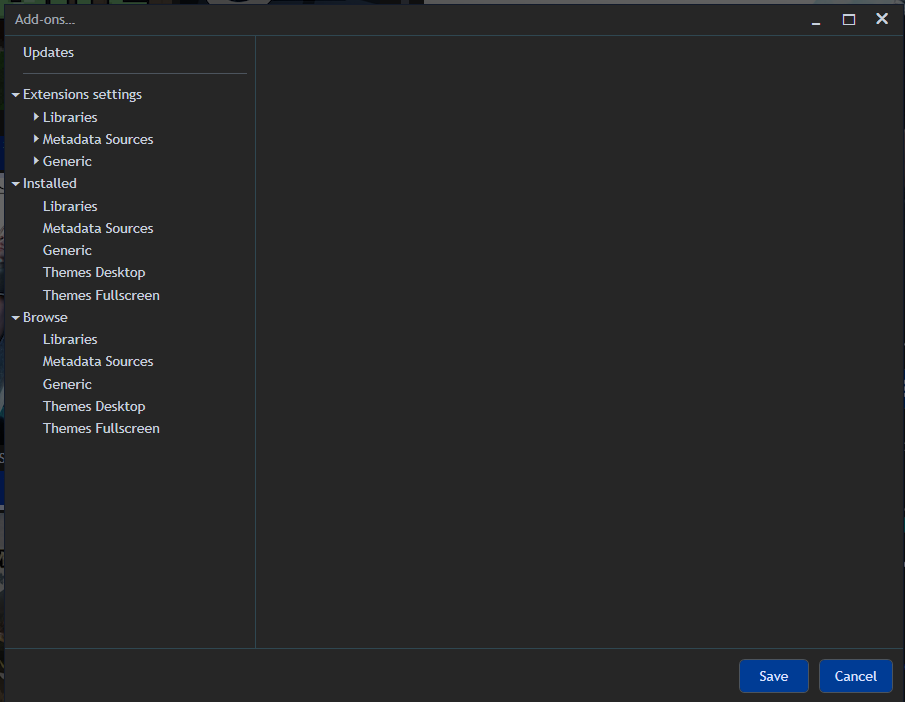
Browse will allow you to install add-on libraries for your game services. Once installed you configure the libraries in the "Extensions settings" section. Navigate to "Themes Fullscreen" in the "Browse" section. My preferred theme for mobile devices is "Playnite Modern UI". Now we can add Playnite to Sunshine so that we launch directly into our "console" mode or "Desktop" mode.
Adding Playnite to Sunshine is done the same way as adding any other application. Start by navigating to your Playnite installation folder for me that's 'D:/Playnite', scroll down until you see 2 applications "Playnite.Desktop.App" and "Playnite.Fullscreen.App".

Right click Playnite.Desktop.App and copy the location, add it to Sunshine and name it Playnite. Do the same for Playnite.Fullscreen.App and name it Playnite Mobile. Next I will teach you how to change resolutions using scripts and commands in Sunshine.
Sunshine Utils and Resolution Changes
When I first started using Sunshine I didn't have a way to automatically change resolutions. Every time I would access my gaming rig from a different device I would manually change resolutions in Windows. I tried several different solutions and the easiest best option I found is a resolution change utility on Github called Sunshine-Utils. You can download it here.
Create a folder on your PC and name it Sunshine-Utils. Download the resolution_change.exe and place in this folder.
NOTE: The exe may trigger a warning from your anti-virus. I did a code review of the code and everything seemed in order. After discussion with the dev it's likely due to the language/compilation of the app since it's common for bad actors or those with limited coding skills. Feel free to review the code, and if you are a software developer you may be able to contribute.
Now we will need to create a script so that Sunshine can execute a resolution change. This is fairly simple, create a text file in the same folder as the resolution_change.exe and enter:
resolution_change.exe --width 1920 --height 1080 --refreshrate 60 --detach-other-monitorsSave the text file as something like "remote-1080.bat". This particular configuration will change the resolution to a standard 1080p, set the refresh rate for 60hz and detach any monitors other than your primary monitor. --detach-monitor-other-monitors will disable other displays, preventing games from loading on a screen you can't see. Create a .bat for any resolution you plan to use with your rig. For example I have a Samsung s23 Ultra as a portable handheld so my configuration looks like this:
resolution_change.exe --width 2316 --height 1080 --refreshrate 120 --detach-other-monitorsIf you have issues detaching the correct monitor open a PowerShell window in the same directory as the resolution_change.exe. Type cmd, then type
resolution_change.exe --list-displays
Now you can change your script to detach only specified monitors, you would do this by replacing
--detach-other-monitors with
--detach-monitor \\.\DISPLAY2Ensure the monitor ID matches the monitor you want to detach.
Now create another text file in the same directory and add the following:
resolution_change.exe -rSave this file as "reset.bat", we will use this to re-attach monitors and change the resolution back to the original resolution.
Now we will add these scripts as commands in Sunshine so they execute before we load our game, desktop or Playnite. Return to Sunshine and navigate to the application you setup. Go to the "Command Preparation" section, click the green "Add Commands" button. Your screen will now look like this:

In the "Do Command" box paste the directory path for your "remote-1080.bat" script use the path copy method I outlined earlier. In the "Undo Command" box paste the directory path for your "reset.bat" script. When finished it should look something like this:

Now when you load the application from the Moonlight client your resolution will automatically change. You may need to download a utility like CRU to add resolutions not normally supported by your system. You can download CRU here.
Recommended Moonlight Client Settings
I use the Moonlight client on several different devices for different purposes. I have it installed on my MacBook Pro, my S23 Ultra, my Galaxy Tablet, and my Windows PC. Below I will give some rough guidelines for 720p, 1080p, and 1440p. Settings are basically the same across all Moonlight clients. Feel free to adjust these as you see fit:
720p
I primarily use 720p when on a mobile network, or wifi network with restricted speeds. Sunshine can use a lot of data and bandwidth so reducing the resolution and bitrate is a must. Here is a screenshot of the settings I use on Windows and MacOS devices:
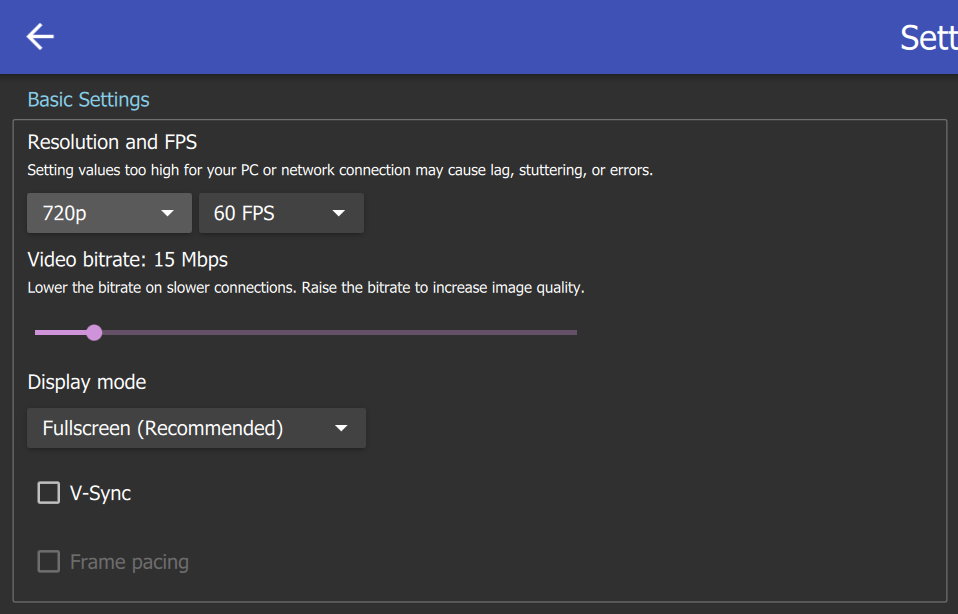
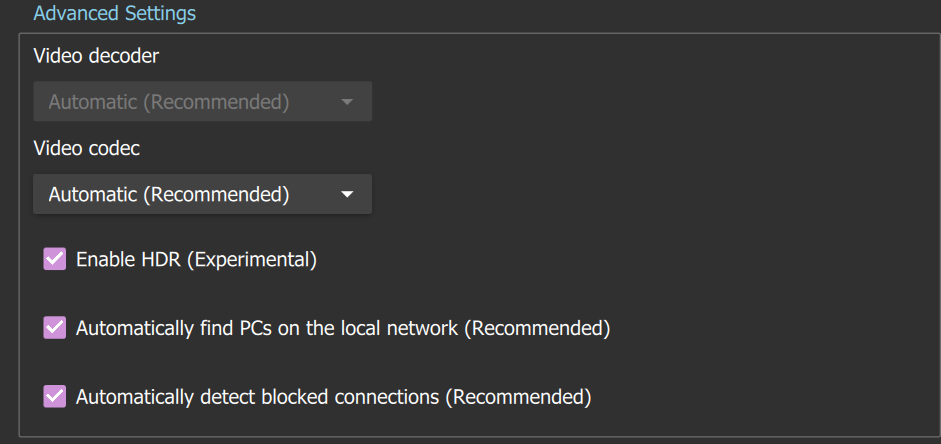
Feel free to experiment with the settings and adjust to your liking. On devices that support HDR I like to enable it in advanced settings:
1080p
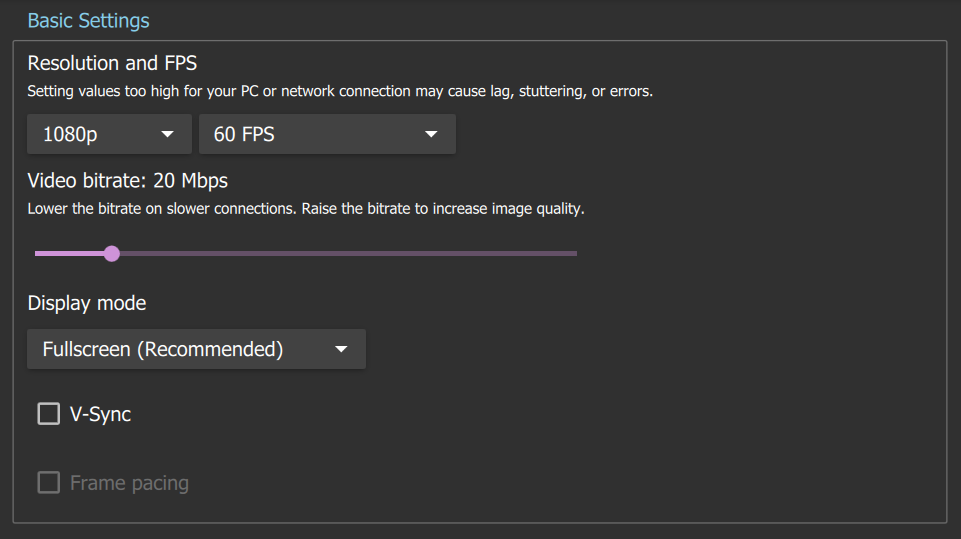
For 120 FPS add 10-15Mbps for the Video bitrate.
1440p
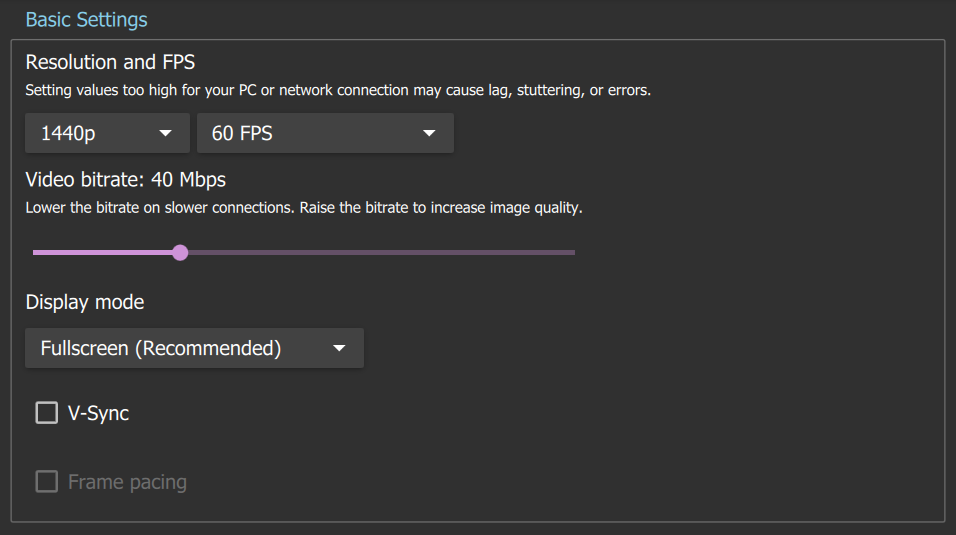
For 120 FPS add 15-20Mbps for the Video bitrate.
4k
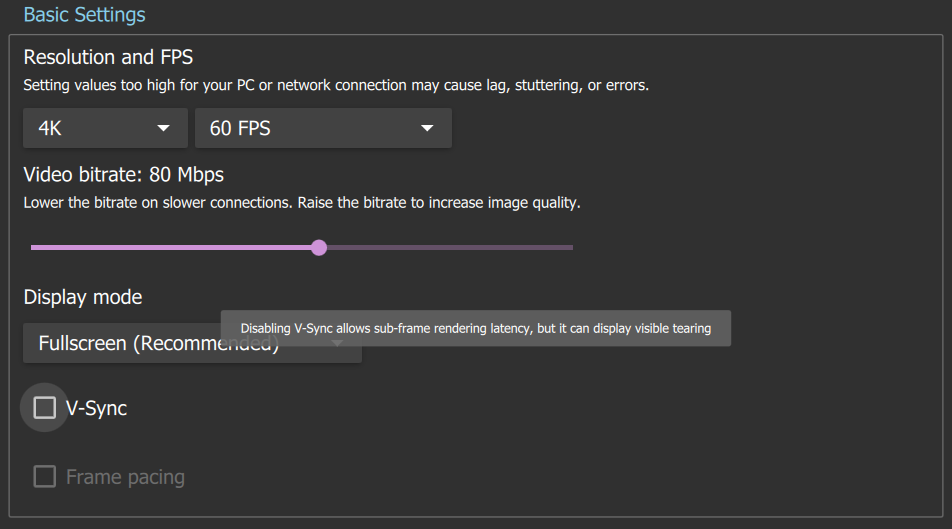
For 120FPS add 30-40Mbps to the Video bitrate.
Your system may default to similar settings, and these are very network dependent. If you find a lot of network artifacting or slow connection you may need to reduce the bitrate. If you find that it's "grainy" or lower resolution you can try to increase the bitrate if your network speeds allow. If you need to reduce data usage you will want to use the lowest bitrate the network will support, on mobile networks I find it's best to be at or under 25Mbps.
A Word on Security
It is possible to have Moonlight accessible from the internet using the Moonlight Internet Hosting tool. I will not cover that here, it requires exposing ports and in my opinion that is very dangerous, especially for remote access software. If you want to be able to access it outside your home network you can take that security risk, the guide is available here.
I would instead encourage you to use a VPN tunnel such as Wireguard, Netmaker, Tailscale or something similar. This will provide significantly more security, and some routers may support Wireguard directly. This eliminates the need for open ports except the single port for the VPN tunnel, reducing the potential threat attack surface. There are many articles on setting up VPN tunnels, a quick simple solution would be wg-easy found here.
Remote Rig Ready
You should now have a setup for a fully remote gaming or VNC rig, with the ability to specify custom resolutions using .bat scripts. You should also be setup to use Playnite as a basic unified or mobile console launcher, and hopefully you have setup a VPN tunnel for remote access. This is an awesome way to play games, work, or access your network and systems remotely. You can easily set this up for a significant other, child or family member with almost any device. Since the client is only acting as a screen for the stream it doesn't require a lot of power. You can give a second life to old phones, tablets, or laptops.
Have fun with your new remote gaming rig, stay tuned for the 2nd part where I will teach you how to fully virtualize your gaming rig, and run it headless using software drivers. I will also write a 3rd article with more in depth Playnite setup for a complete professional, and polished final product!
